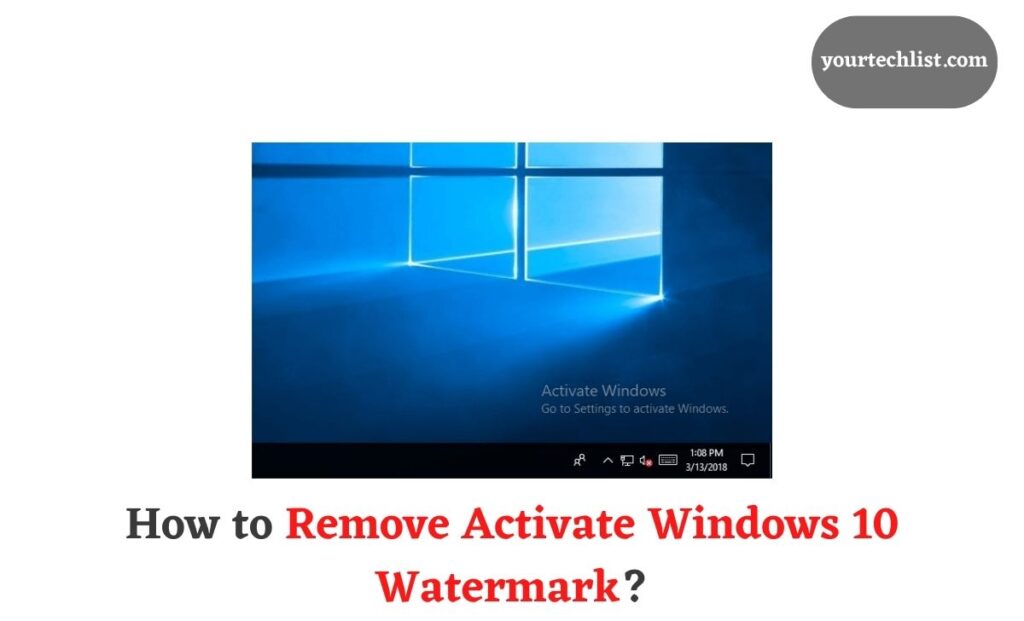
The world is full of technological improvement and information. The main process of this technology is a computer. It used and provided in many ways. The main function of the specific computer is activation and the activate Windows watermark. Here, this article provides the immense categories to How to Remove Activate Windows Watermark in Windows 10/7/8/XP. Follow the section.
HOW TO REMOVE ACTIVATE WINDOWS WATERMARK?
To remove or cancel your activated windows watermark with a product key, you can easily cancel it. This is only because of the expiring reason of, the windows license. If you don’t have the product key to remove the activate watermark of windows 10, follow the below steps.

STEP1: Initially, turn on your PC, click the start menu and search for Notepad and open.
STEP2: You have to type the following commands on the notepad.
@echo off
taskkill /F /IM explorer.exe
explorer.exe
exit
STEP3: Go to the File option and select save as this file with the name of “remove.bat” with the proper location.
STEP4: Now, open the file and right-click on the remove.bat file and select the “Run as administrator”.
STEP5: One information command will open and close itself. You have to restart your PC.
STEP6: Now, there is no “activate windows” on your desktop.
HOW TO GET RID OF ACTIVATE WINDOWS WATERMARK PERMANENTLY?
There are many ways to get rid of activate windows watermark permanently. This article provides a few ways to remove the window’s watermark. One is Remove Via Regedit and the other is Ease of access. Follow the ways.
REMOVE VIA REGEDIT
The remove via Regedit is a simple option to remove the windows watermark. Follow the steps.
STEP1: First, you can turn on your device and search for “Regedit” and click enter.
STEP2: Click”Yes“, if you are prompted by UAC.
STEP3: You can browse to HKEY_CURRENT_USER and then go for the control panel to the desktop.
STEP4: Click the Paint Desktop Version and double tap it.
STEP5: You have to select the Hexadecimal option and make sure of that.
STEP6: There, change the value date to 0 and then click “OK” and close the registry page.
STEP7: Finally, restart your windows 10.
STEP8: After you turn on your system, there is no activate Windows watermark.
EASE OF ACCESS
Using the ease of access method, you can freely and easily remove the window’s watermark without any queries. Refer to the following steps.
STEP1: Turn on your PC and search for the Control Panel and then click on the app.
STEP2: On the next screen, you see the Ease of Access Centre option and then click it.
STEP3: You have to scroll down and then tick the boxes in the Remove Background Images where it’s available on the page.
STEP4: Select “OK” button.
STEP5: Then “Restart” your device.
STEP6: Finally, your windows watermark has disappear from your device.
with it. But, better you have to activate your windows watermark for the good sake.
Also, Read
FINAL VERDICT
In this article, there are numerous ways to remove your windows 10 activate watermark permanently. So, you have to use this article for your reference when you are stuck. And also some more information also posted here. Use this reference to remove the Activate Windows 10 Watermark permanently in many ways.


